

These Chocolate Covered Apples are the perfect festive treat or fall snack. Crisp, juicy apples dipped in chocolate and drizzled with caramel and more chocolate, what’s not to love? The whole family loves these delicious chocolate caramel apples.
My favorite recipes are quick, simple, and delicious. And these Chocolate Covered Apples check all the boxes. They come together in no time, which is also how fast they disappear!
If your family likes these as much as mine, I suggest you make a double batch! It’s also a great weekend activity to make with the kids. Cut and dip the apples and let them roll the apples in their favorite toppings.

These delicious chocolate-covered apple slices also make great party favors. Wrap them in cellophane bags or place into food safe boxes to serve at your next holiday party or potluck.

Why You’ll Love This Recipe
- Delicious & Easy Snack - The combination of crisp apple slices with chocolate makes for a tasty fall dessert.
- Quick Recipe - These chocolate-dipped apples come together in no time. You just have to allow for the chocolate to set.
- Festive - These are such a fall treat but can be changed up for different holidays and seasons.
Chocolate Covered Apple Ingredients
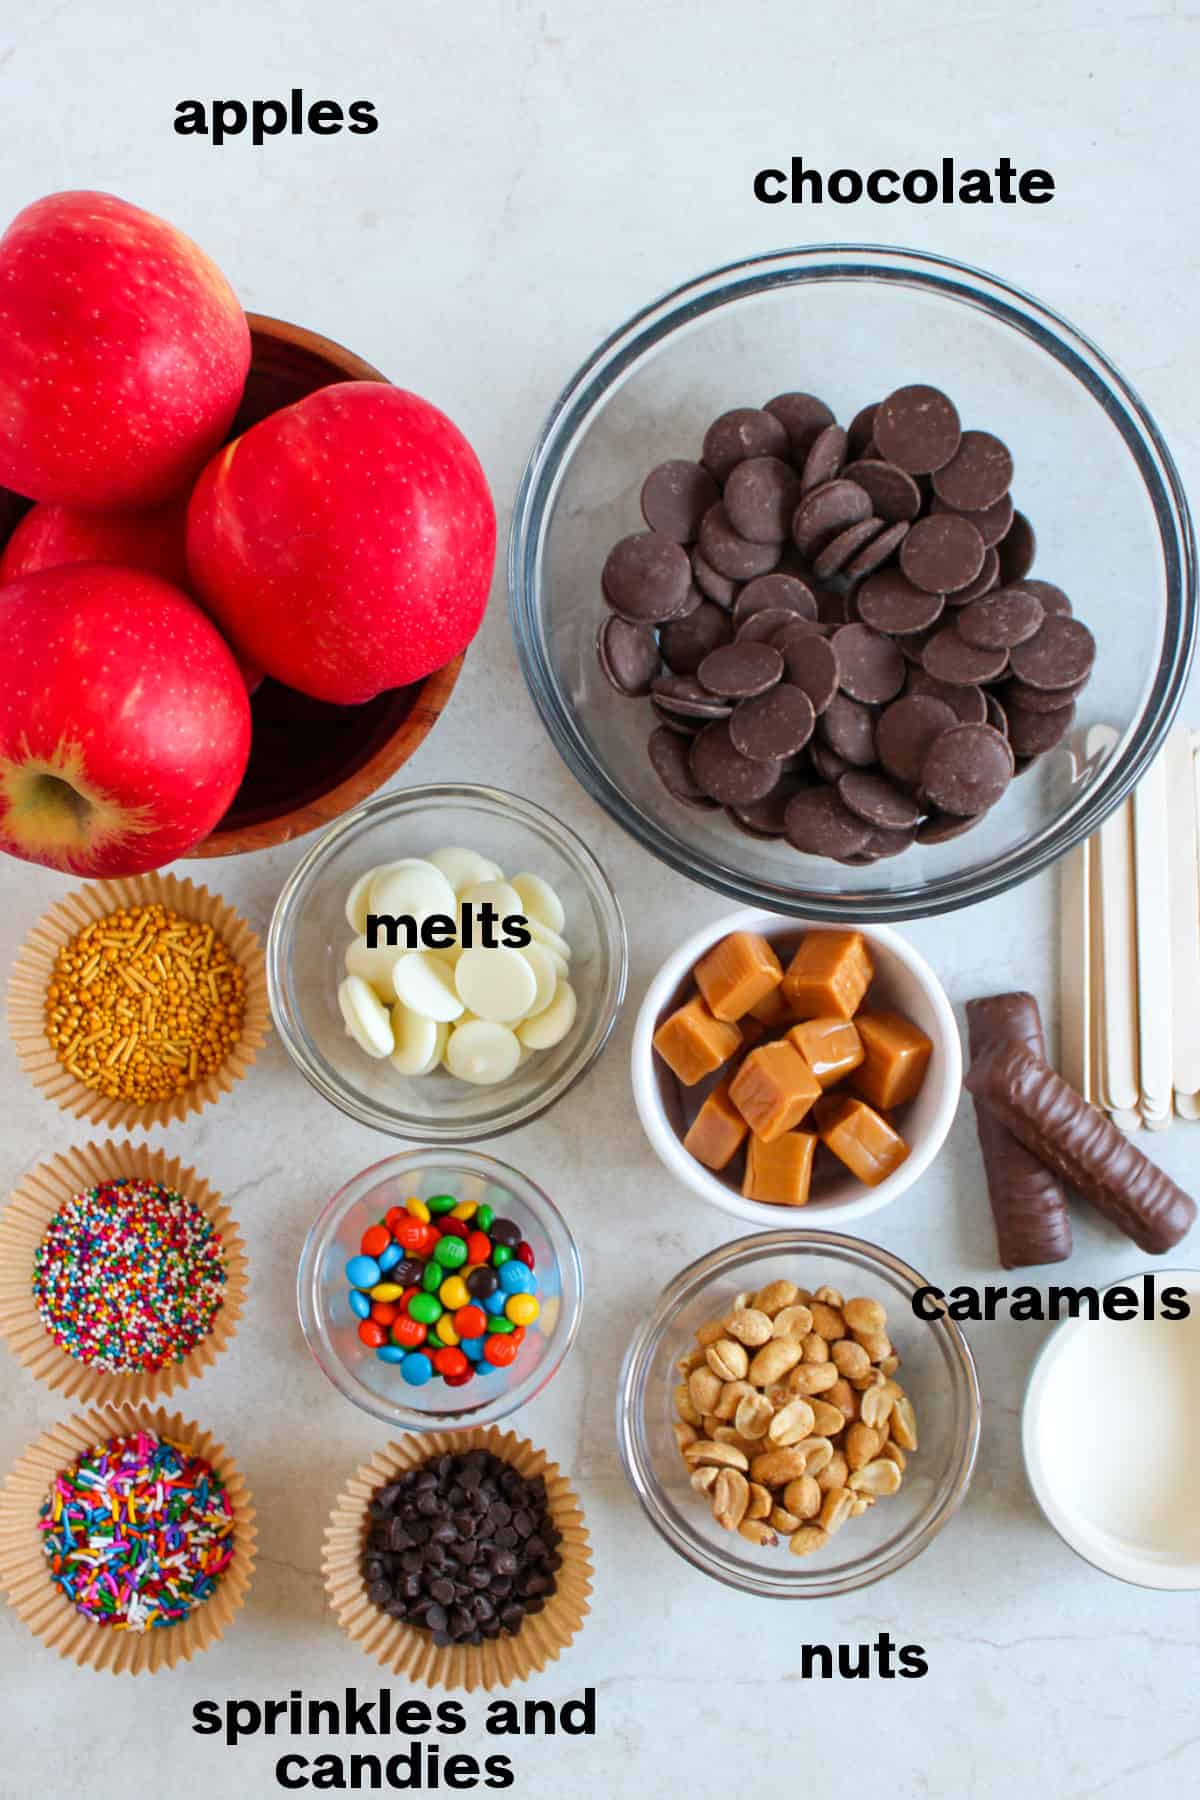
Just a handful of simple ingredients combine to make this tasty treat.
Apples - Use your favorite apples, I like granny smith or fuji or Honeycrisp apples for this recipe.
Chocolate melting wafers - I used Ghirardelli melting chocolate
White chocolate melting wafers - I used Ghirardelli
Classic Melting Caramels - for making beautiful caramel drizzles on the chocolate
Heavy cream
Bamboo sticks - like candy apple or popsicle sticks
Optional Toppings:
- Mini M&Ms
- Peanuts, chopped
- Variety of Sprinkles
- Mini chocolate chips
- Twix Bar, chopped
Equipment Needed To Make
- Small bowl - microwave safe
- Parchment paper or wax paper
- Cookie sheet or baking rack
- Bamboo sticks/wooden popsicle stick/candy apple sticks
Substitutions & Alterations
- You can use leftover halloween candy for the toppings.
- You can use milk chocolate or dark chocolate or both
- You can make chocolate covered pears or orange slices with this similar method.
How to Make the Best Chocolate-Covered Apples
Step by Step Instructions overview - Full recipe in recipe card below.
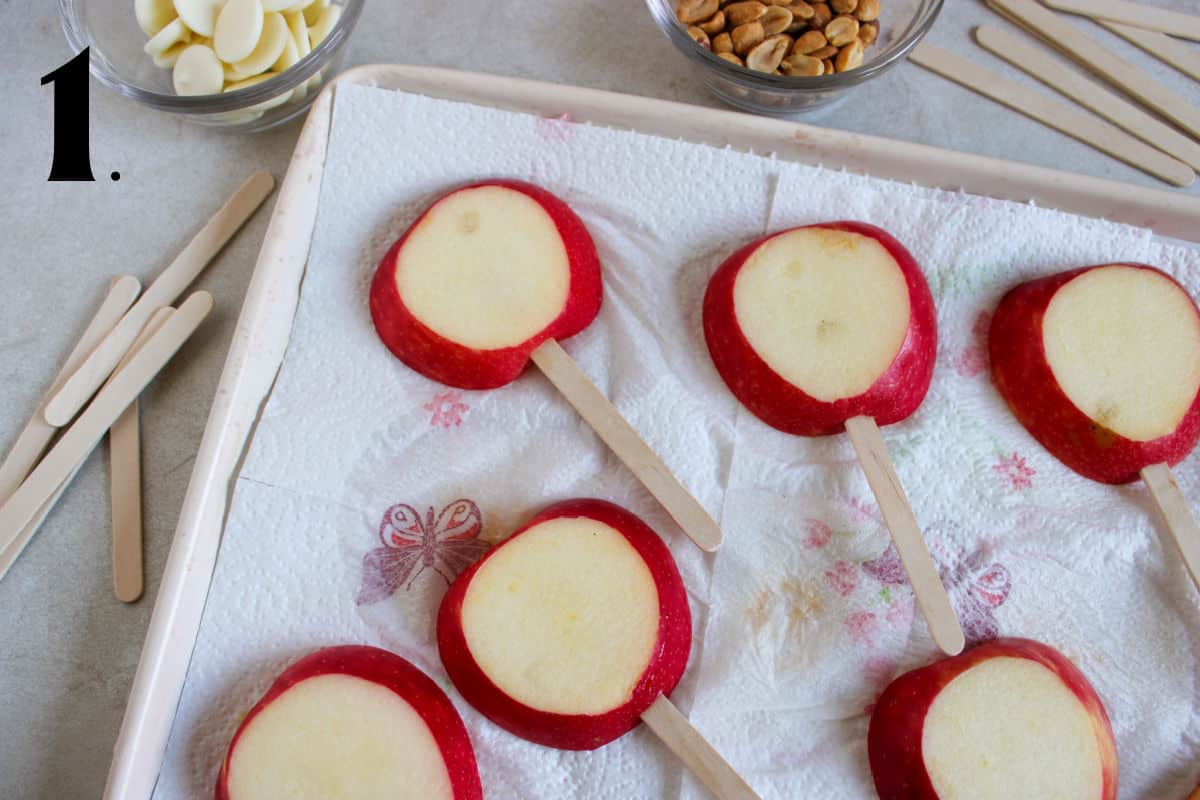
Step 1 - Cut apples into slices and insert wooden sticks into the bottom.
Would you like to save this?
Step 2 - Melt the chocolate and dip the apples in the melted chocolate.
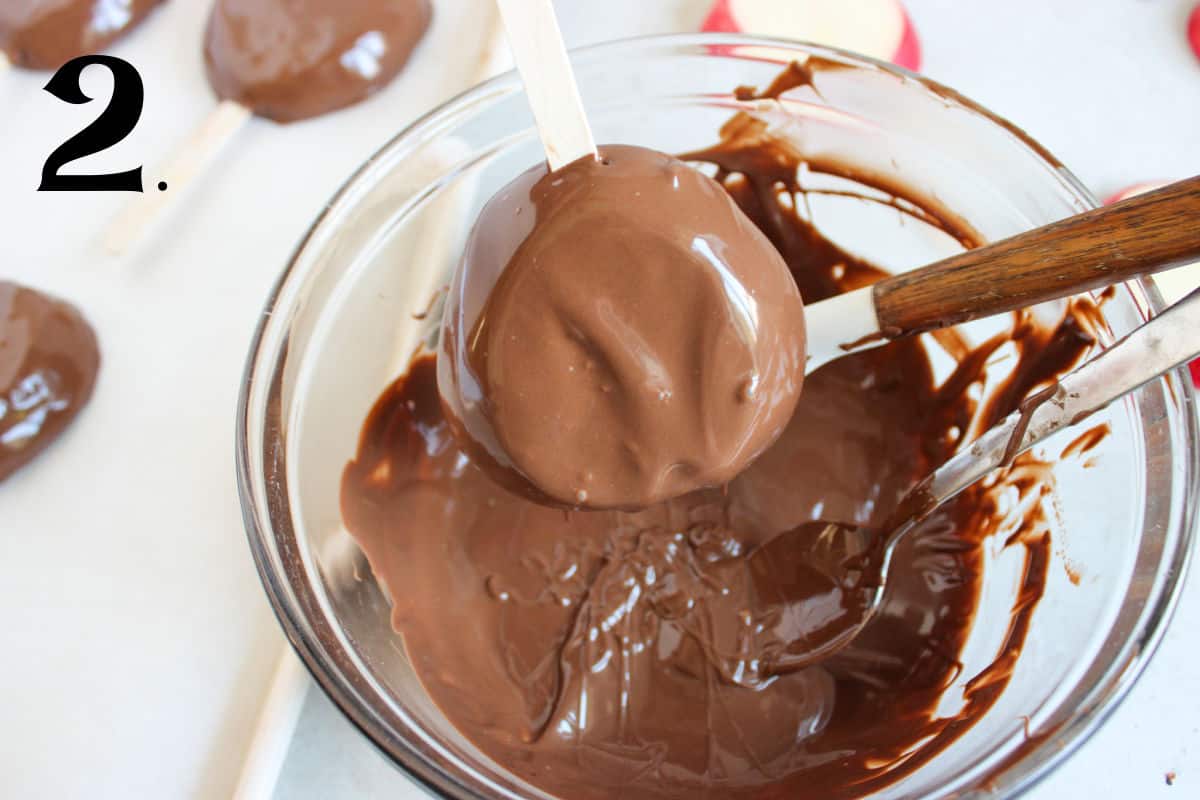
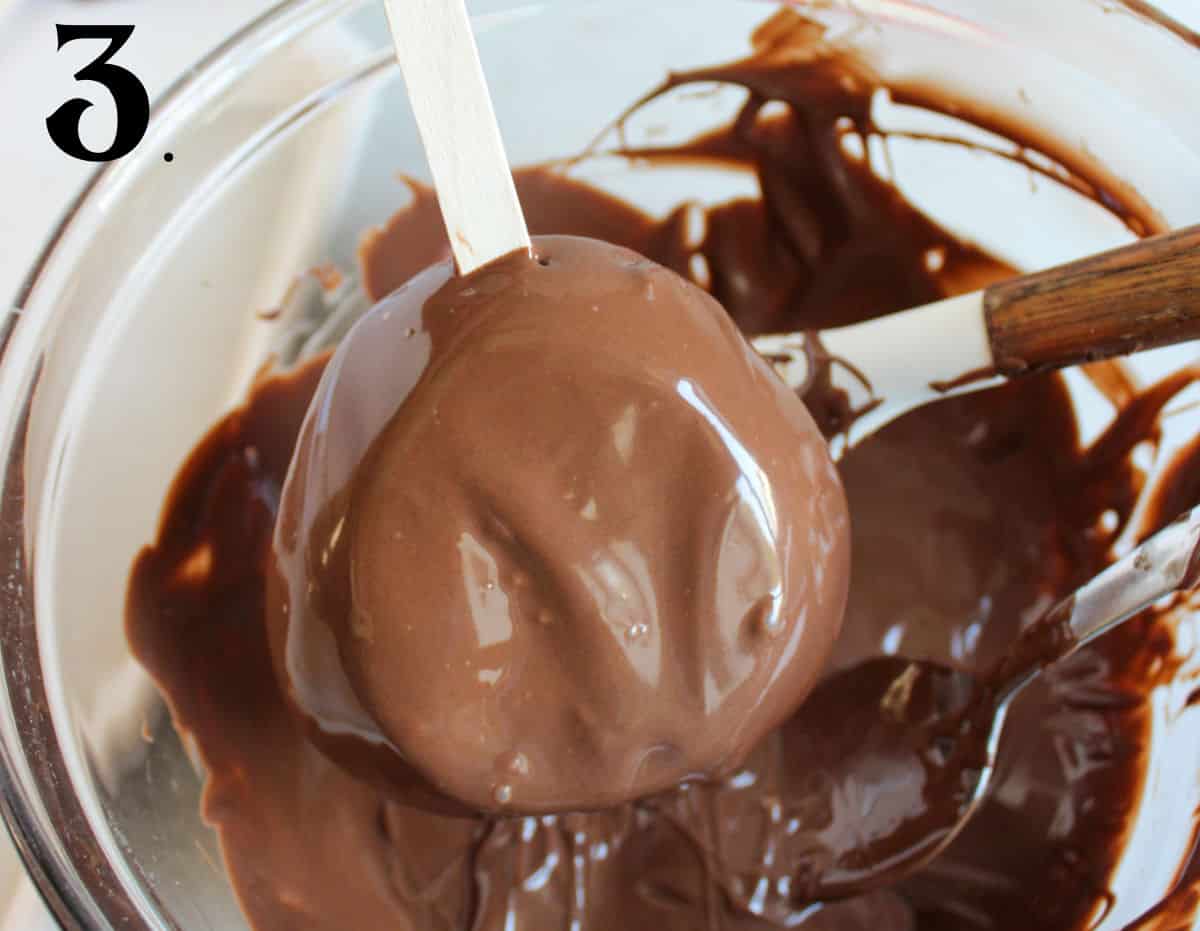
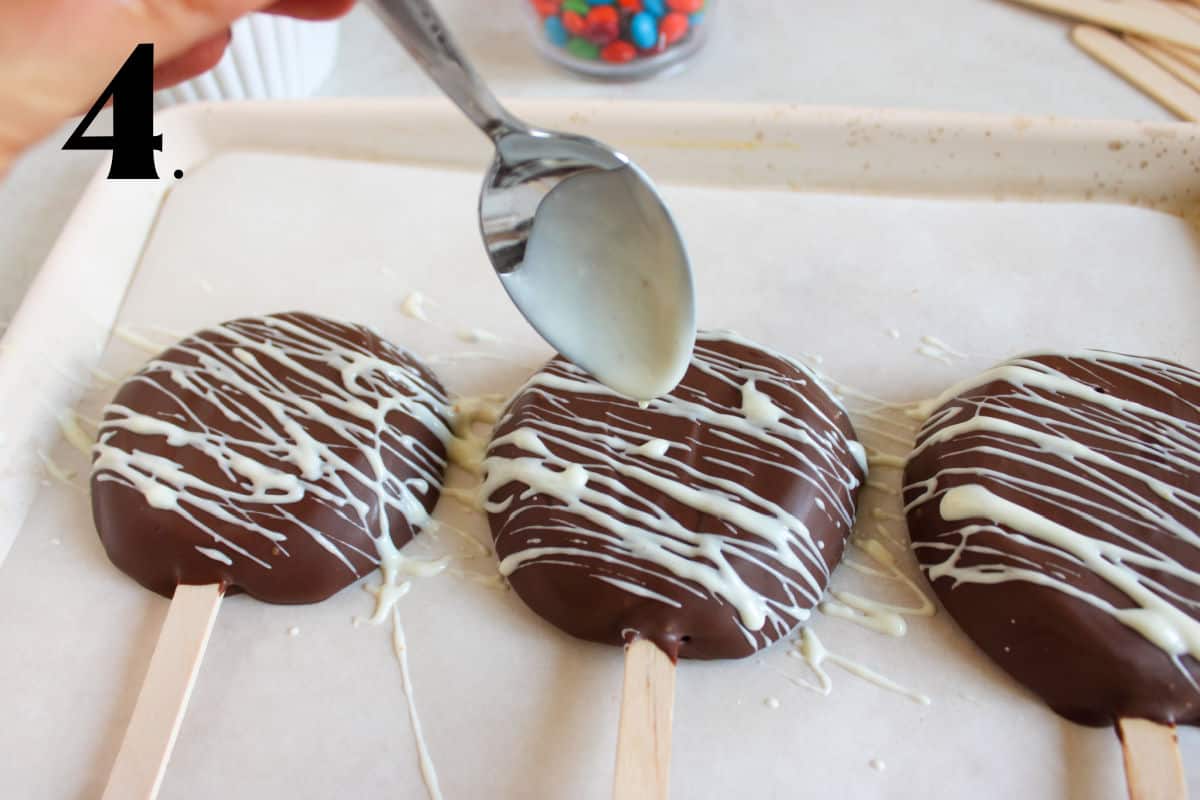
Step 3 - Use a spoon or spatula to coat. Chill apples.
Step 4 - Melt the white chocolate and drizzle over the cold apples.
Step 5 - Melt the caramel in the heavy cream and drizzle melted caramel over the apples.
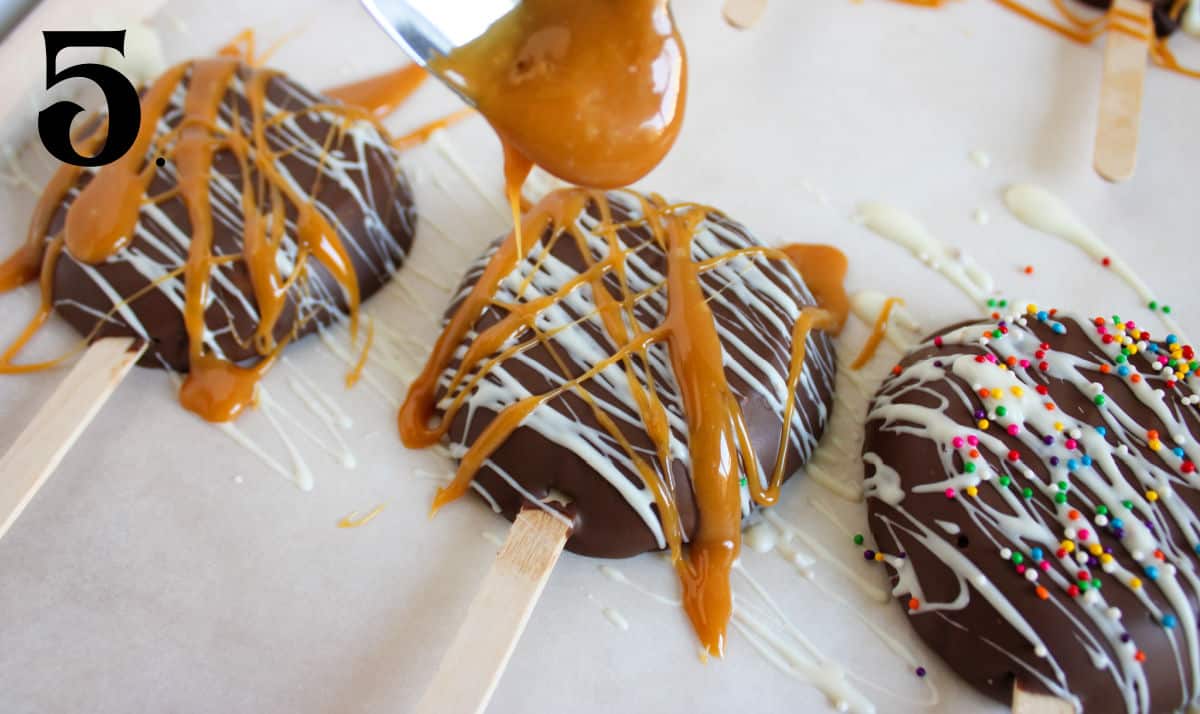
Step 6 - Top with toppings and let set in the refrigerator. See topping suggestions in the section below.

Time Saving Tips & Tricks
- Be sure to wash the whole apples and dry them thoroughly with a clean rag or paper towel so that the chocolate adheres properly.
- Use quality chocolate for a smooth, rich coating.
- You can also use the double boiler method to melt chocolate if you wish.
- Once the chocolate is melted, dip apples into the bowl of chocolate, turning to coat evenly.
- Let the excess chocolate drip off before placing the apples on parchment paper.
- Add the dry toppings while the chocolate coating is still wet so they stick better
- Be sure to use the rounded bamboo sticks and not the pointy ones to prevent the apples cracking.
- The best apples are firm, crunchy apples like a Honeycrisp or Granny Smith apple. Avoid soft and mushy ones. Hint: any apple with the word “delicious” in it usually isn’t.
- These apples can be made a day or two in advance and stored in the refrigerator.
- Store leftover chocolate-covered caramel apples in an airtight container for up to 3-4 days.
How to Serve Chocolate Apples
These chocolate caramel apple slices are great as a party snack or dessert. They also are nice as party favors. Wrap in cellophane bags or place into food safe boxes. Once you’ve dipped and drizzled the chocolate and caramel you can also add all sorts of extra toppings. These are just some of our favorites.
- Mini M&Ms
- Chopped peanuts
- Variety of Sprinkles
- Mini chocolate chips
- Chopped Twix Bar or your favorite candy bars
- Crushed peppermint or butterscotch candies
- Sprinkle a little coarse sea salt over the chocolate
How to Store Chocolate Caramel Apples
Store chocolate caramel apples in an airtight container in the refrigerator. Stored properly, chocolate covered apples will be good for up to 3-4 days.
More Dessert Recipes
Strawberry Cheesecake Parfaits
More Delicious Apple Recipes
Looking for other recipes like this? Try these:

📖 Recipe

Chocolate Covered Apples
Equipment
- Microwave Safe bowl
- knife
Ingredients
- 4 large Envy or Honeycrisp apples
- 1 bag Ghirardelli chocolate melting wafers*
- ⅓ cup Ghirardelli white chocolate melting wafers*
- ½ cup Krafts Classic Melting Caramels
- 1 tablespoon heavy cream
- Bamboo sticks*
- Extra Toppings:
- Mini M&Ms
- Peanuts chopped
- Variety of Sprinkles
- Mini chocolate chips
Instructions
- Line a baking sheet with parchment paper and set aside.
- Cut apples into ½ inch thick slices and place on a paper towel. Put another paper towel on top of the apples and gently press down to remove as much excess water as possible. If the apples are wet, the chocolate will not stick.
- Using a knife, cut a small slit in the bottom of the apple. Then, insert the bamboo stick. (Using a knife first will prevent the apple from cracking when inserting the stick)
- In a microwave safe bowl, melt chocolate wafers according to the package.
- Dip each apple into the melted chocolate and use a spoon/spatula to cover completely. Allow any excess chocolate to drip off and place the apple onto the baking sheet to harden. Repeat until all the apples are coated. Place in the refrigerator to harden.
- Meanwhile, in a small bowl, melt the white chocolate wafers according to the package.
- Pull the apples out of the refrigerator and drizzle with white chocolate.
- Lastly, make the caramel by adding the melting caramels and heavy cream to a small saucepan on low heat. Stir constantly for 3-5 minutes until a smooth sauce has formed. Immediately drizzle onto the apples. Add the final toppins.
Notes
Nutrition
If you are not yet subscribing to my CELEBRATE THE SEASON newsletter, you can subscribe here. I share easy recipes for the season that the entire family is sure to love and also a few things that I don’t share here.
Leave a Reply